You can customize pretty much everything in your portal. When installing custom themes, the process is to copy over the code included in the theme zip file and paste it into the theme editor layout.
Click on Admin > Portal > Customize Portal
For more information, check out this page.
Preparing the theme files
Unzip the theme file into your local drive. Once unzipped, you will see the following folder structure:
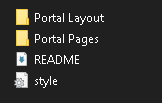
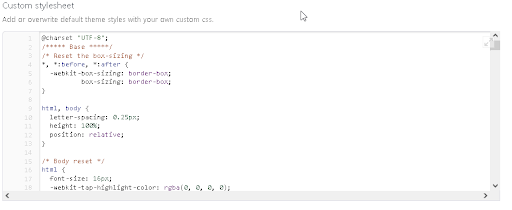
The name of each file indicates the location where you would need to copy the code in Freshdesk Portal Customization. (* for style.css you need to copy to stylesheet tab > Custom stylesheet box)
- Select the file you want to copy, copy and then paste the content of each file to Freshdesk
- It is important to paste the code to the right location in Freshdesk. Please pay extra attention to the file name (e.g. layouts vs pages)
- Copy the files corresponding to the folder name, on layout & pages tab there are 2 section
Portal Layout & Portal Pages
![]()
- Files inside the folder Portal Layout goes to Portal Layout and Portal Pages goes to Portal Pages.
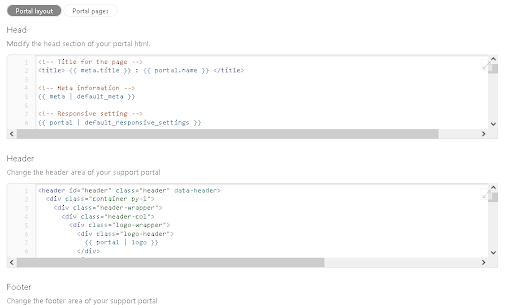
- Portal Layout files consist of :
- Document_head.txt that goes to Head
- Header.txt that goes to Header
- Footer.txt that goes to Footer
- Page_layout.txt that goes to Page Layout
3. Portal Pages files consist of:
- Portal_home.txt that goes to Portal Home
- new_user_signup.txt that goes to New user signup
- Login.txt that goes to Login page
- Search_result.txt that goes to Search results
- Solutions_home.txt that goes to Solutions Home
- Article_list.txt that goes to Article List
- Article_view.txt that goes to Article View
- Solution_category_home.txt that goes to Solutions category home
- Disscussions_home.txt that goes to Discussions Home
- Disscussions_category_home.txt that goes to Discussions category home
- Topic_list.txt that goes to Topic List
- My_topics.txt that goes to My Topic
- Topic_view.txt that goes to Topic view
- New_topic.txt that goes to New topic
- New_ticket.txt that goes to New ticket
- Ticket_list.txt that goes to Ticket list
- Ticket_detial.txt that goes to Ticket detail
- Archived_ticket_list.txt that goes to Archived ticket list
- Archived_ticket_detail.txt that goes to Archived ticket detail

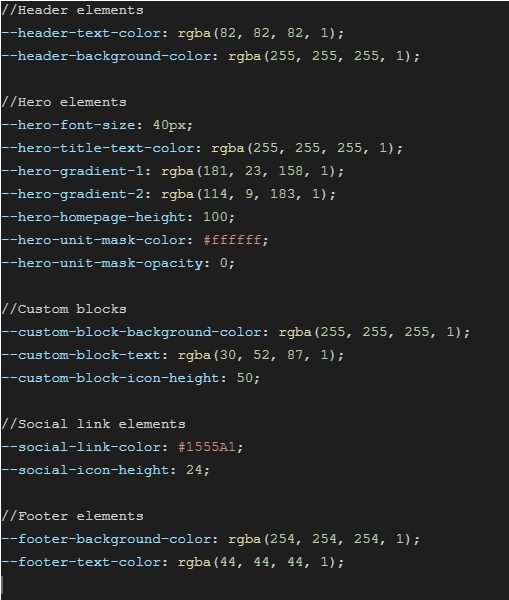
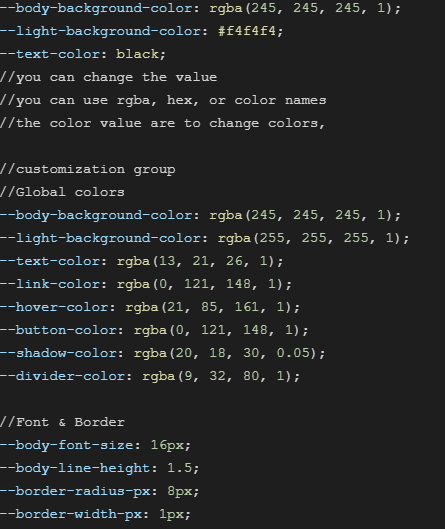
This theme comes pre-configured with default color settings. To change the color settings, please follow these steps:
- Go to Portal Layout
- See Head section
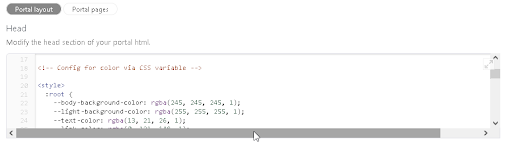
- Edit the file starting from <style> Ex:
This theme comes with default images on the homepage such as the hero image, icons on the homepage, social media icons on the footer, etc.
These images can be hosted within Freshdesk or other locations such as your website, content delivery network, etc. As long as the images are publicly available, we can show them on the portal.
Header Logo
You can change header logo by go to Portal settings then change freshdesk default logo to your company logo

Footer Logo
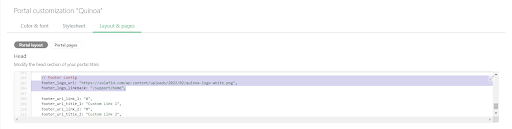
You can change footer logo by go to Portal layout then go to Head area then under footer config change the footer_logo_url to your assets url link, the footer_logo_linkback is for your footer logo hyperlink
Hero Background
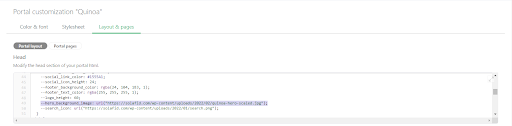
You can change Hero background by go to Portal Layout then go to Head area then look for –hero_background_image change the url (“value”) to your assets url link
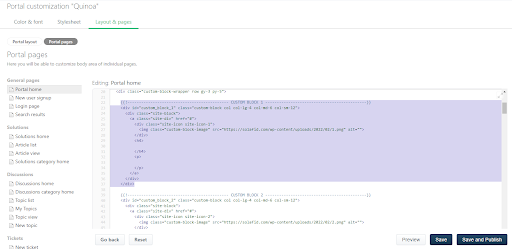
Custom Blocks Image
You can change Custom block image/icon by go to Portal Pages then go to Portal Home then look for {{!——————————————– CUSTOM BLOCK 1 ——————————————–}}, under this code search for this <img class=”custom-block-image” src=”https://solafid.com/wp-content/uploads/2022/02/1.png” alt=””> change the src= “your assets url link”, the steps is same for custom block 2, 3, 4 , etc.
If you don’t have access to a website or server that can host your image assets, you can follow this workaround. You would simply create an article on your Freshdesk portal and insert the images that you’d like to display on the portal. Here are the steps:
Navigate to Solutions add New Category and in Category setting *Visible in Portal set this to test portal as this article is not to shown to public
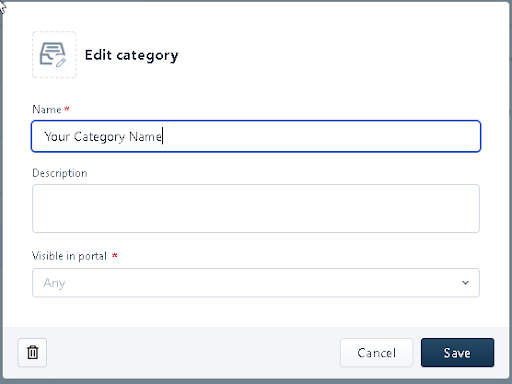
- Then after creating Category you can create Article in it
- Create a new article.
- Add images & assets which you want to use to the article then publish it.
- Then inspect the image element to copy its src source.
- It should look like this